Preparing the asset and avatar
Download a template avatar from this page and create an asset that fits the avatar well. Please see guidelines for information about the polycount, materials, etc. To avoid intersection artifacts you need to define an alpha mask for the avatar. Alpha mask helps concealing parts of the avatar that are covered by the clothing so they won't suddendly become visible because of some deformations.
Here is how it can be done in Blender:
After that, you need to export avatar as .glb file and upload together with the asset file.
- The asset should have the same skeleton as avatar (just copy it) and correct skinning weights (for best results you need manually paint them).
- The mesh and avatar should be aligned to each other and should have identity global transform. Basically -- don't move avatar, and create asset at the same place as the avatar.
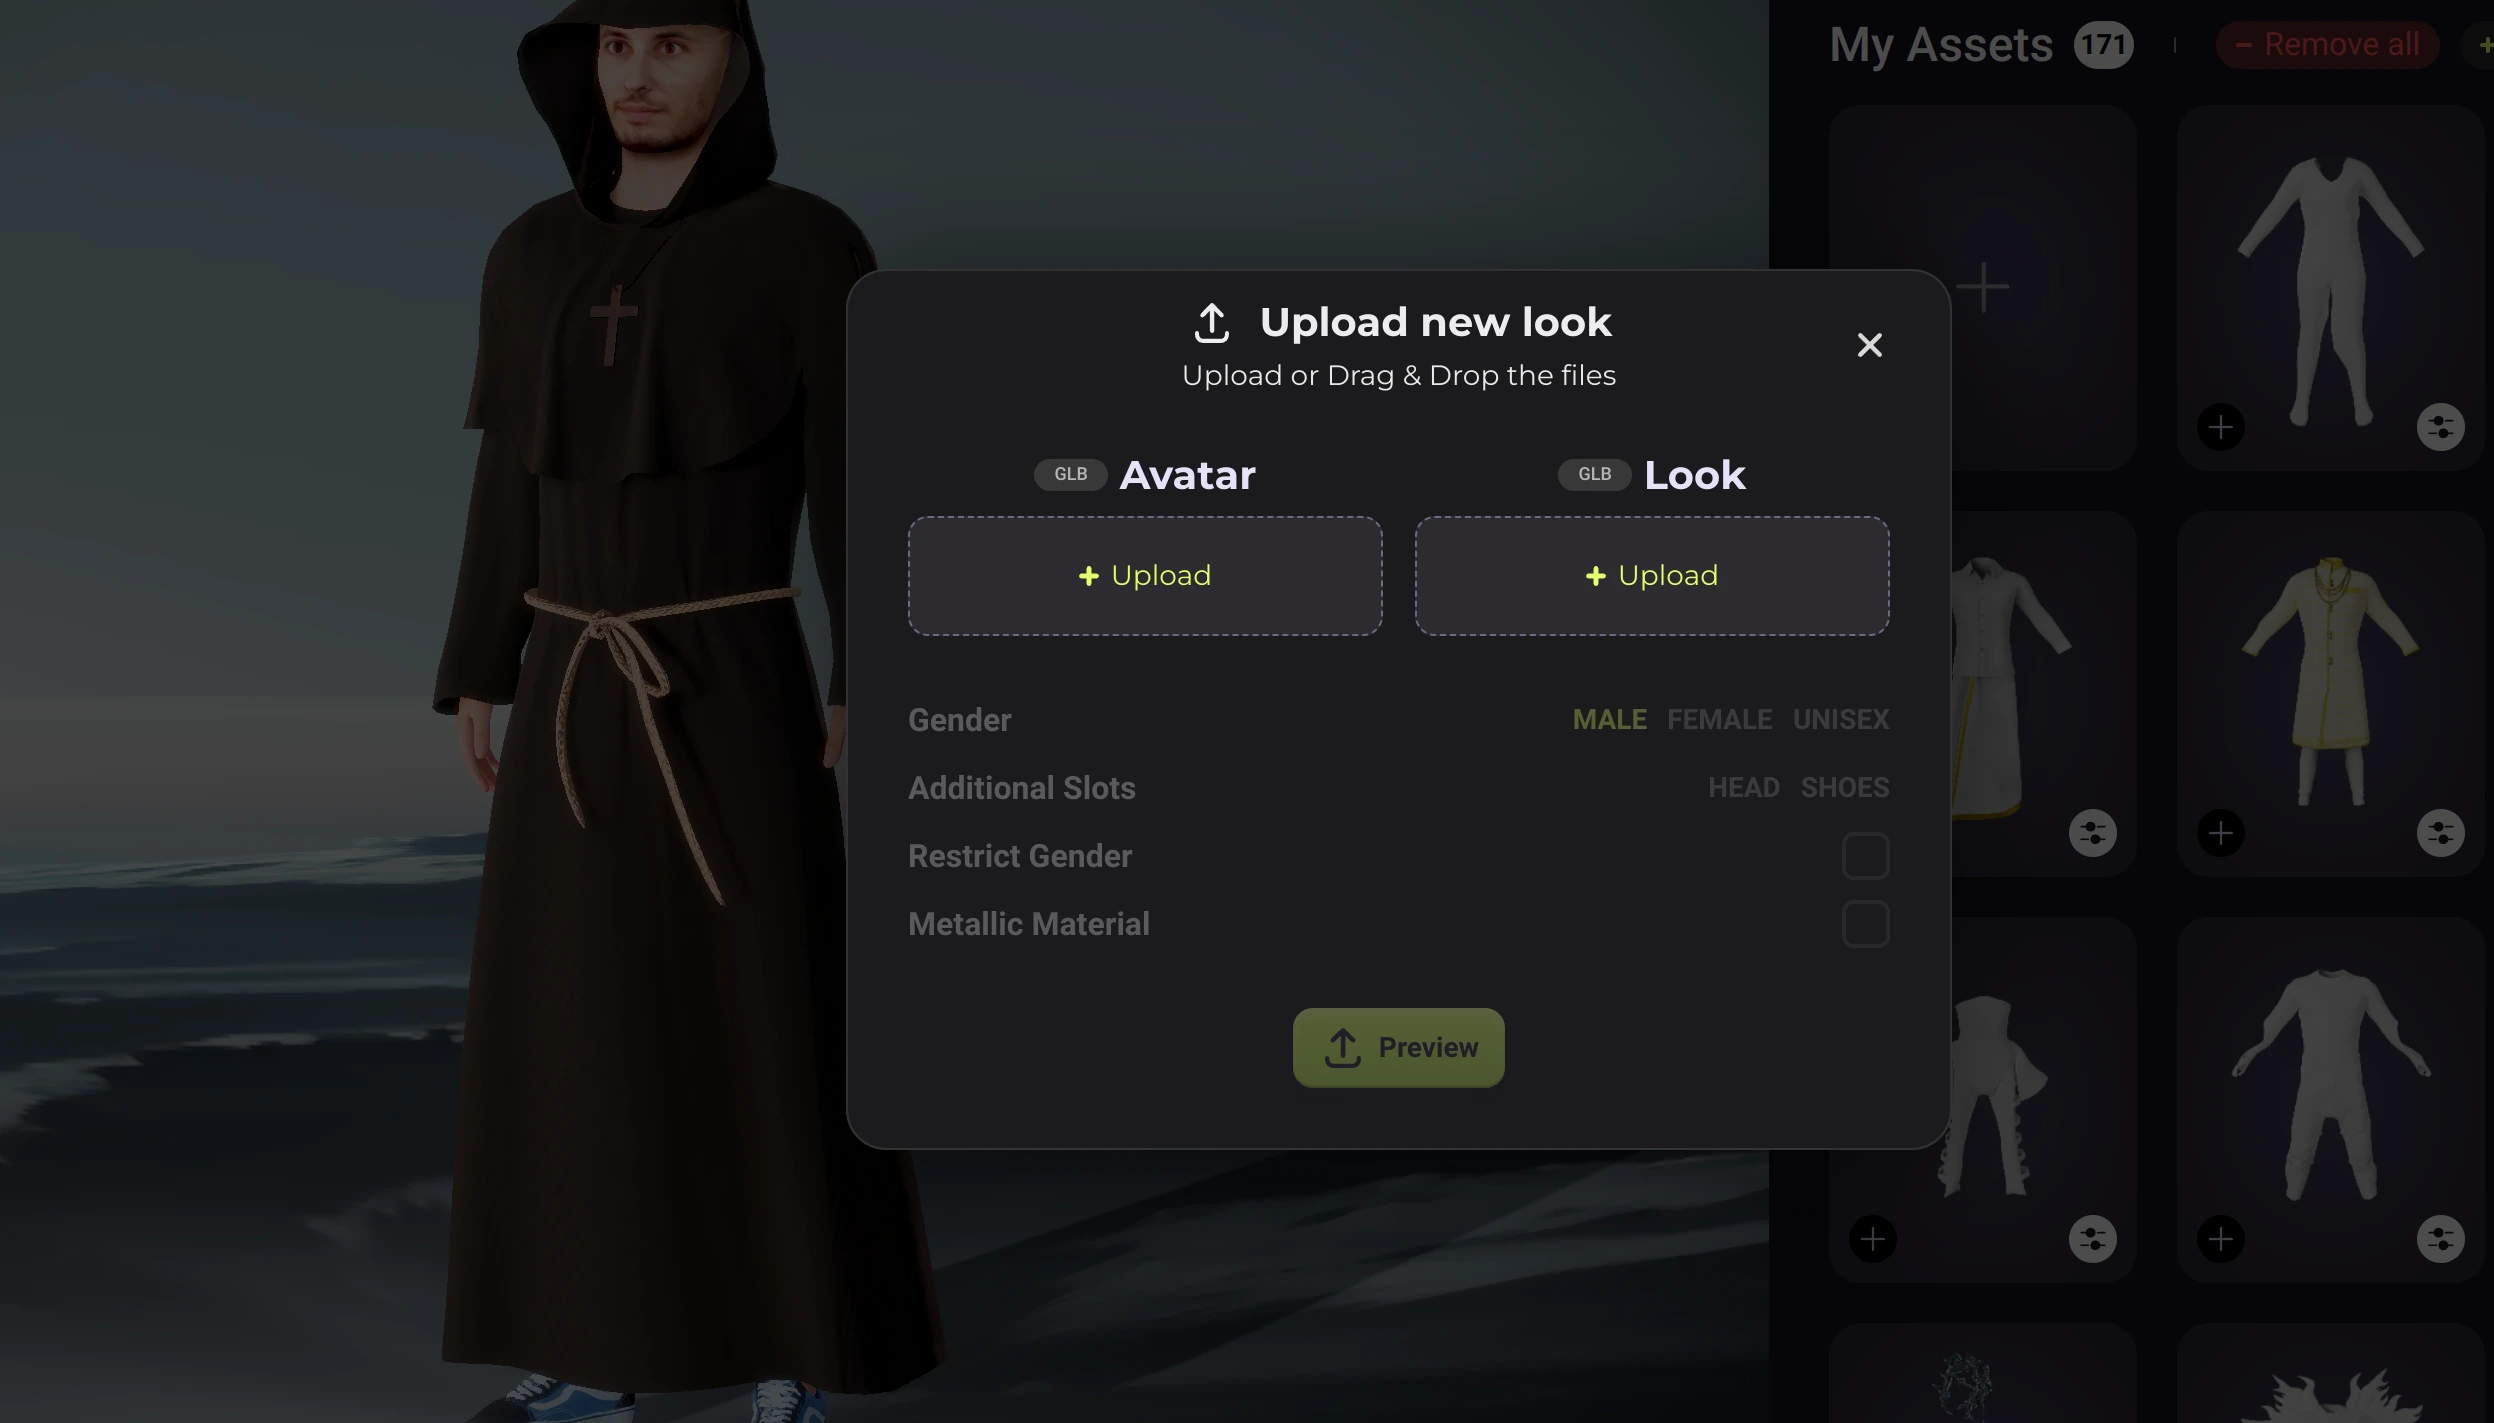
Uploading to Avaturn
Go to developer portal and open asset management panel. Open "clothing" tab and click "Plus sign". Upload avatar and asset .glb files. A thumbnail will be generated automatically. It can take ~30 seconds to process the asset after uploading.
When the asset appears in the gallery, make sure it works well with all avatar bodies. When ready, click "Save" to finalize the asset. Finally, add the asset to your project by clicking "plus" button.
Example asset
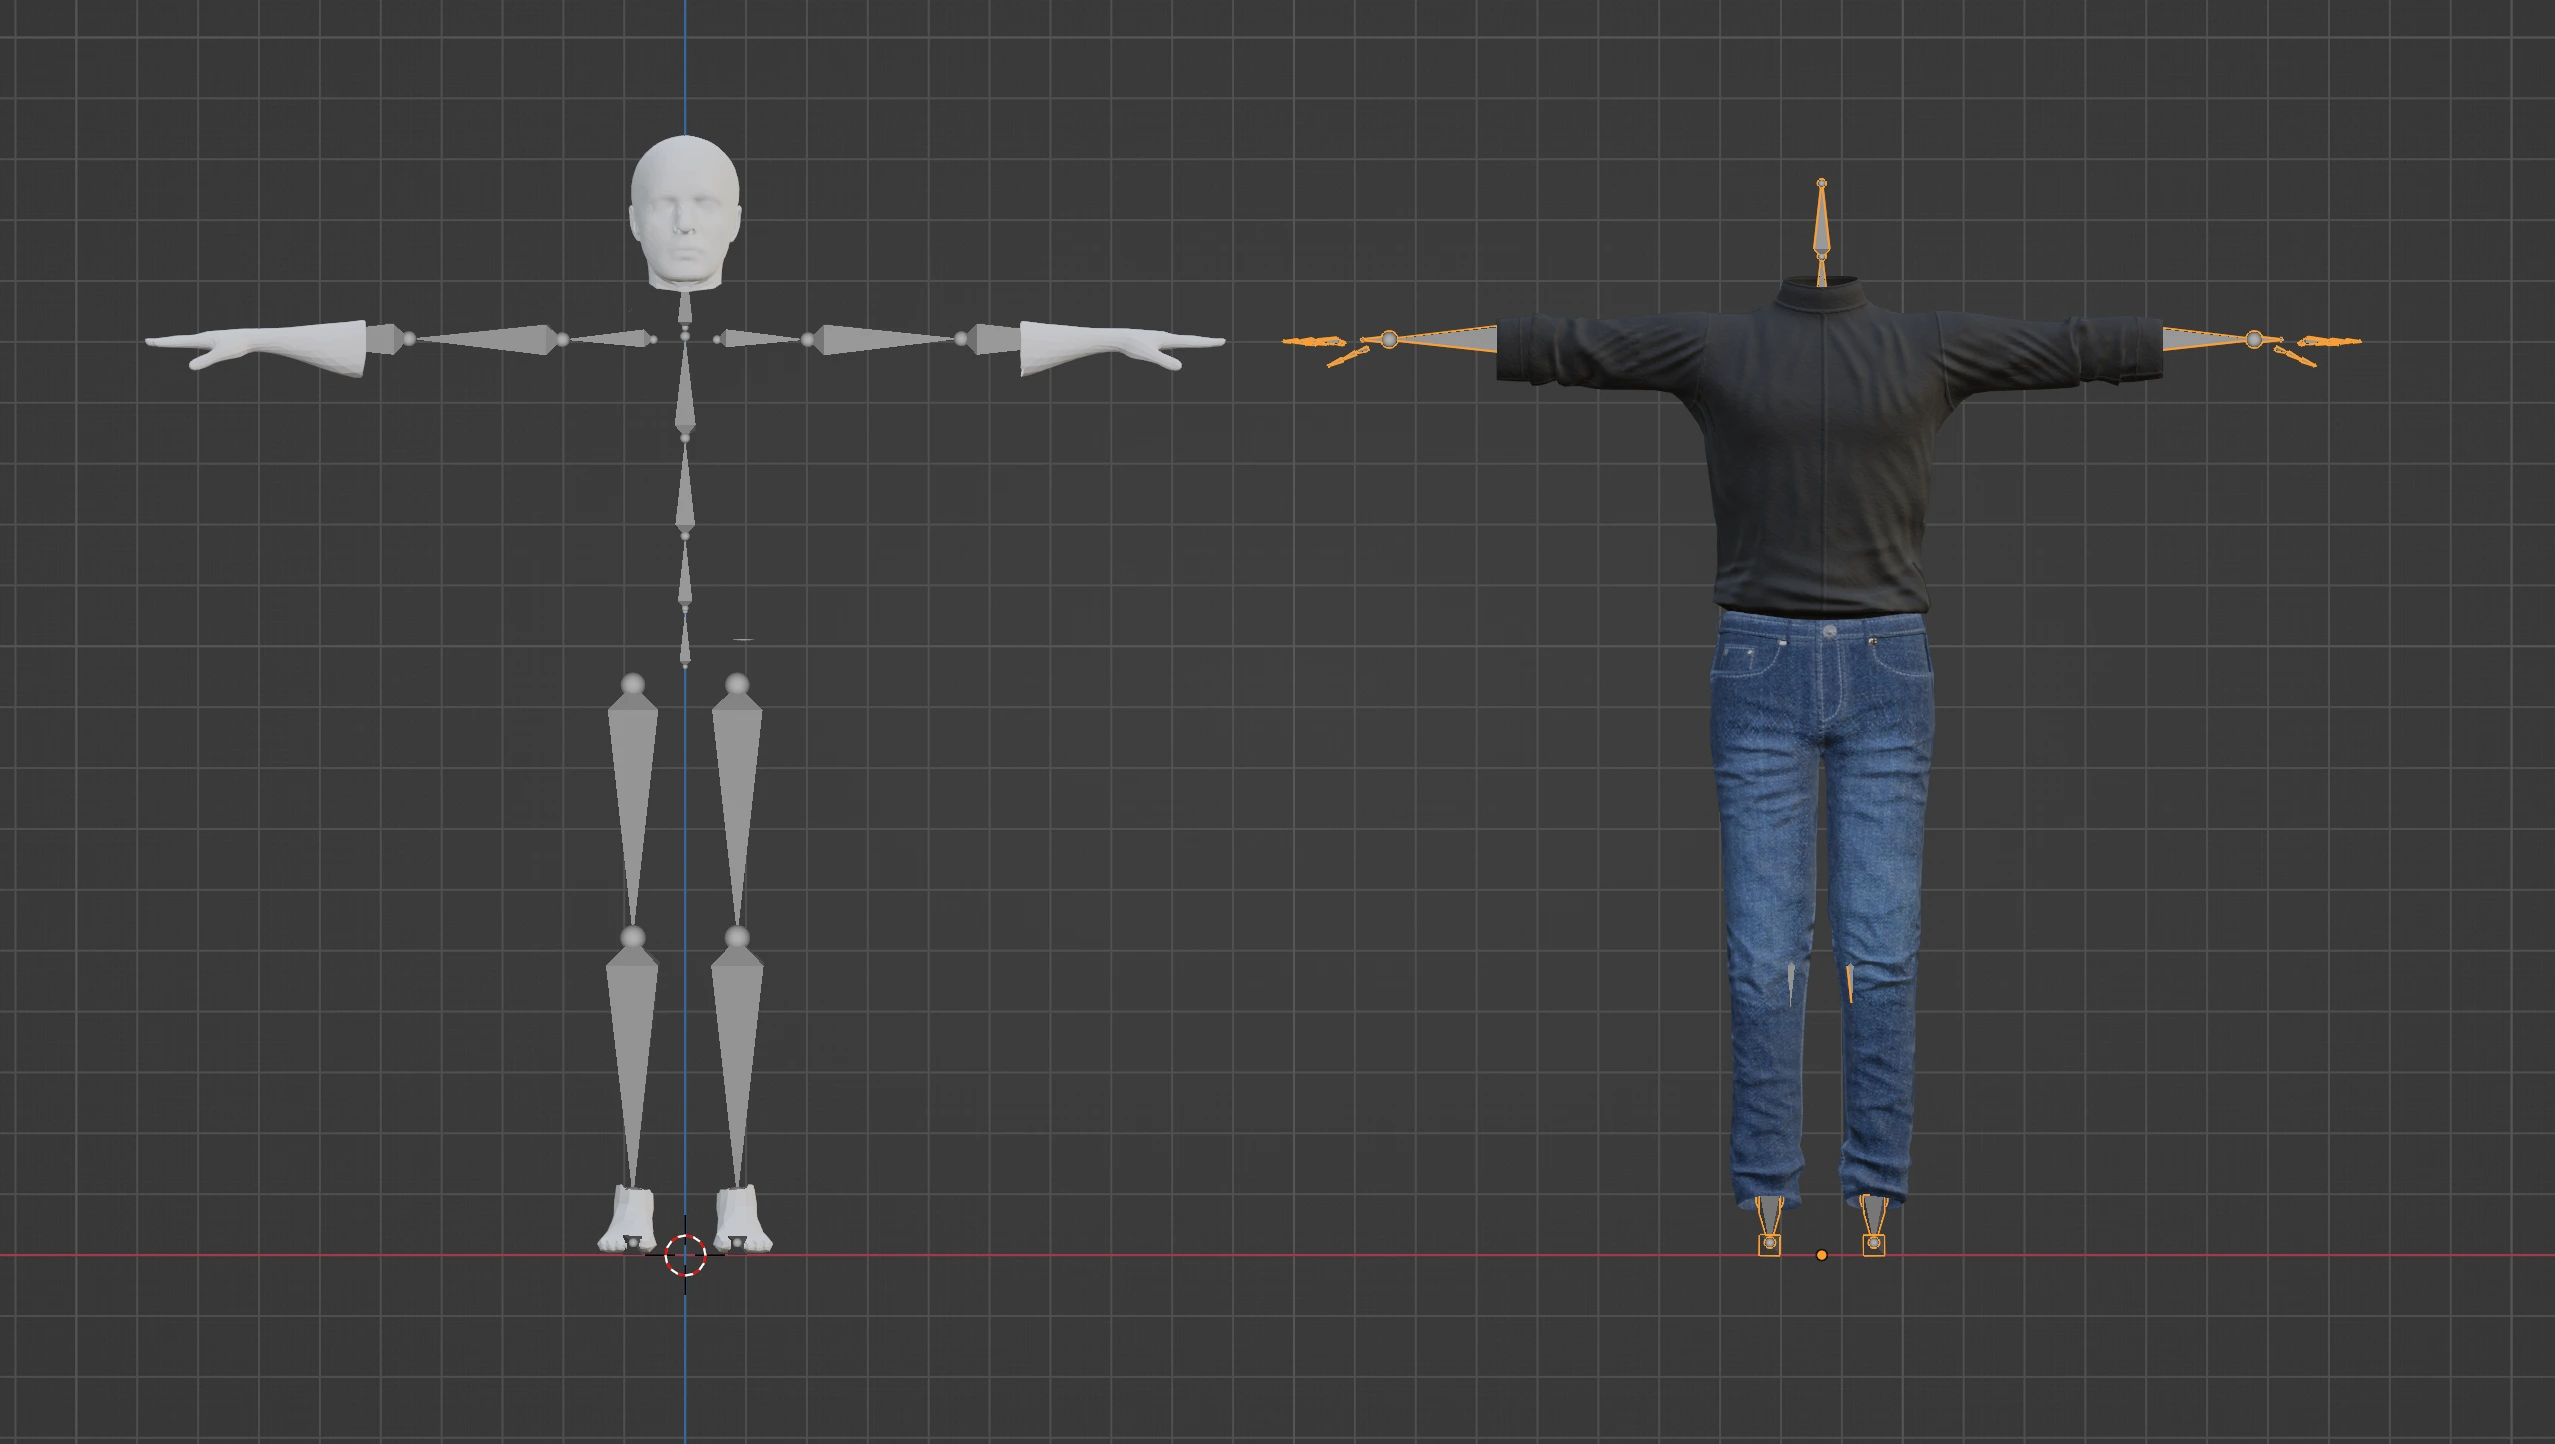
Note: asset and avatar are standing in different places just for illustrative purposes. In real scenario they should always be aligned.